Add New Immunization
Click on ‘Add New Immunization’ at the top-right corner of the page (Figure 3) will directly land the user to add a new immunization page. (Figure 4)
Add New Immunization is done in 3 Steps:
- Add Immunization
- Select Installation
- Confirm
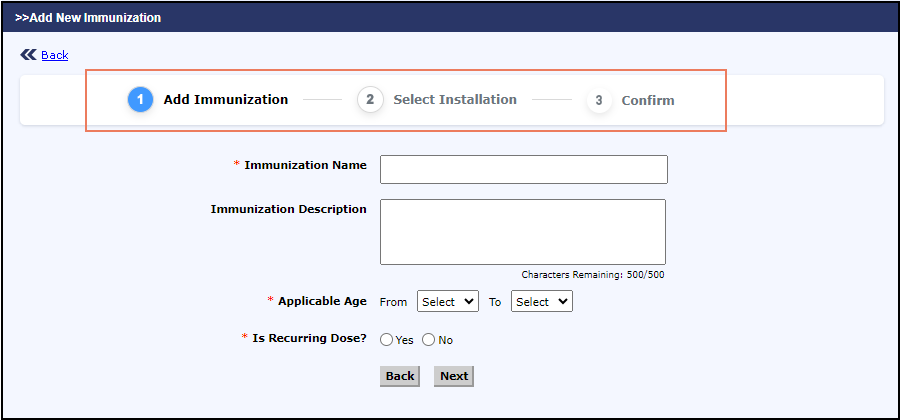
i. Add Immunization
- The user needs to enter the following details to add a new immunization (Figure 5) such as Immunization Name, description, Applicable age and type (Recurring or non-recurring).
- Clicking ‘Yes’ or ‘No’ for the field ‘Is Recurring Dose’ determines whether the dose is a recurring one or not.
- ‘Yes’, indicates that it is a recurring dose where the immunization is administered throughout the specified period with a set frequency. On clicking ‘Yes’, need to add the additional details such as the Dosage Frequency is displayed. The frequency is configured by giving the time-period (months / years), over which the dosage is to be administered. (Figure 5).
- For example, Influenza (flu) is a recurring immunization which needs to be taken every year for adults aged from 19 to 65+
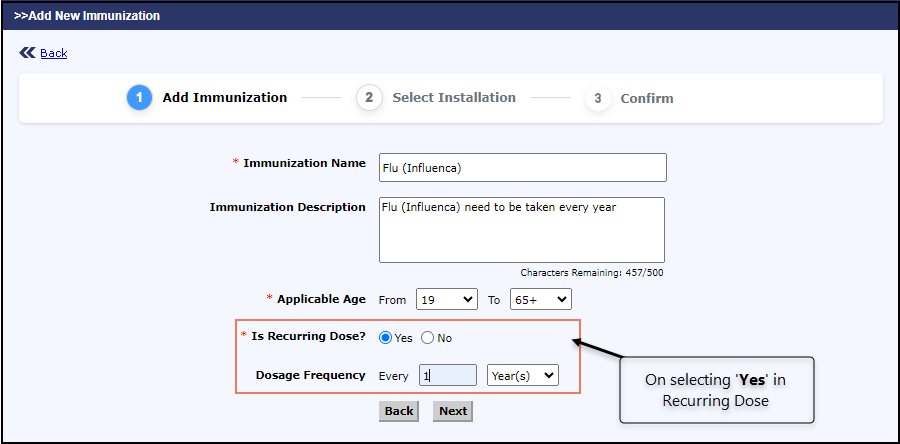
Figure 5 Recurring Dose as ‘Yes’
- ‘No’, indicates that the immunization is not a recurring dose, and it is administered only for a specified number of times in their lifetime. The number of doses to be taken, and the interval between the doses (months / years) is required as input for the non-recurring doses. (Figure 6).
- For example, Covid 19 is a non-recurring immunization, where only 2 doses need to be taken throughout one’s lifetime with an interval of 15 weeks.
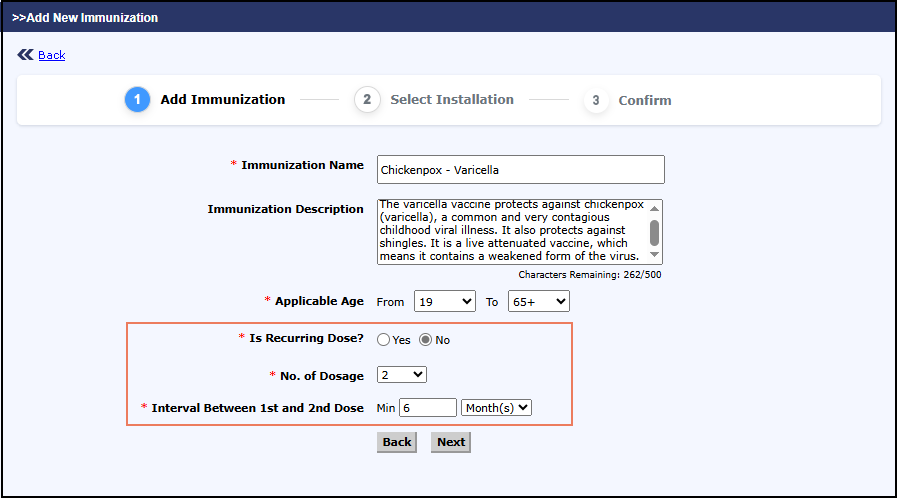
Figure 6 Recurring Dose as ‘No’
- Clicking Next will land the user to the ‘Select Installation’ step.
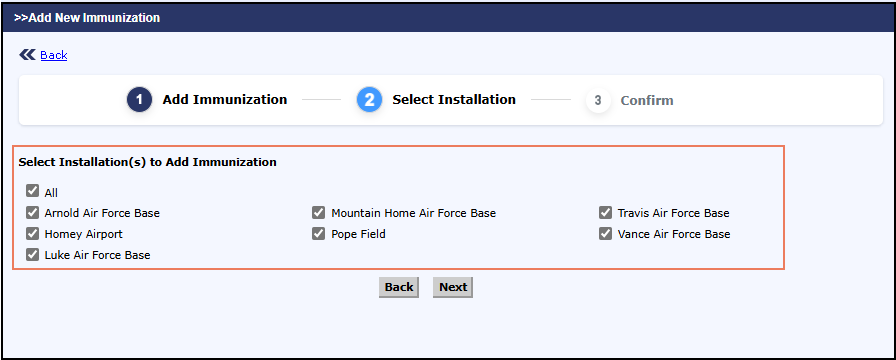
ii. Select Installation
The user can select the installation (Figure 7) to which the immunization setup is to be applied for the staff by choosing from the list of installations.
Note: By default, all the installations will be selected. User can modify as needed.
- Clicking Next will proceed with the confirmation page and on clicking Back will redirect to the Add Immunization Page.
iii. Confirm
In this step, the details provided by the user in the previous steps are displayed. Clicking the 'Submit' button will save the setup details (Figure 8) and displays a success message (Figure 9).
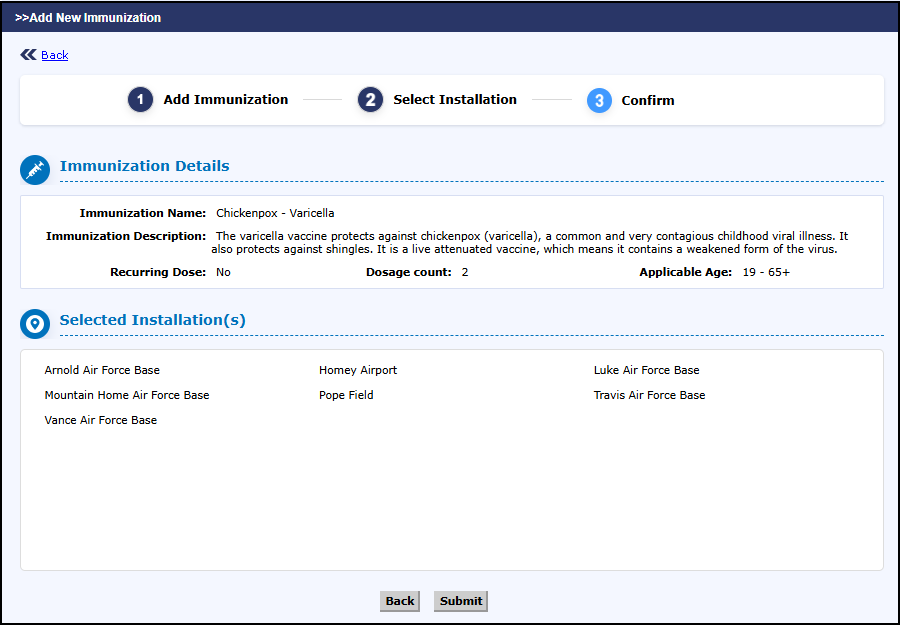
Figure 8 Confirm Page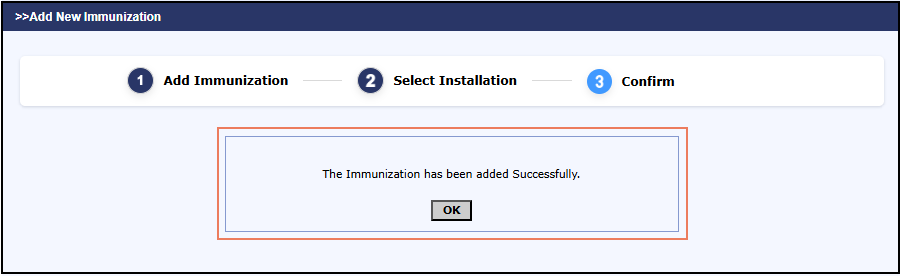
Figure 9 Added Immunization success Message
- Clicking ‘OK’ (Figure 9) will navigate the user back to the Staff Immunization Setup Page (Figure 3), where the newly added immunization will be listed.